Subscribe to Posts by Email

Subscriber Count

    698

Disclaimer

All information is offered in good faith and in the hope that it may be of use for educational purpose and for Database community purpose, but is not guaranteed to be correct, up to date or suitable for any particular purpose. db.geeksinsight.com accepts no liability in respect of this information or its use. This site is independent of and does not represent Oracle Corporation in any way. Oracle does not officially sponsor, approve, or endorse this site or its content and if notify any such I am happy to remove. Product and company names mentioned in this website may be the trademarks of their respective owners and published here for informational purpose only. This is my personal blog. The views expressed on these pages are mine and learnt from other blogs and bloggers and to enhance and support the DBA community and this web blog does not represent the thoughts, intentions, plans or strategies of my current employer nor the Oracle and its affiliates or any other companies. And this website does not offer or take profit for providing these content and this is purely non-profit and for educational purpose only. If you see any issues with Content and copy write issues, I am happy to remove if you notify me. Contact Geek DBA Team, via geeksinsights@gmail.com

Pages

18c Database : MEMOPTIMIZE_POOL_SIZE in SGA

Starting 18c, A new pool is introduced in SGA called MemOptimize pool to store the frequently access tables (in other words pin your tables in buffer cache) via primary key values. The Memoptimized Rowstore (pool) uses a memory area in the system global area (SGA) called the memoptimize pool that stores the hash indexes of the tables when enabled for fast lookup.

For Fast look up of the tables you must,

  • Have a primary key on the table
  • No compression is used on the table

When you set Memoptimize_pool_size to a non zero value that much size is allocated to memoptimize store from SGA. So you must be careful while setting this as it takes away the memory from SGA.

You can use alter system set memoptimize_pool_size=n scope=spfile to set the parameter. Note this parameter is not dynamic and required database restart.

To enable memoptimize on tables , you can use create/alter table statement with optimize for read option.

  • create table test (id number primary key, name varchar2(10)) mem optimize for read segment creation immediate;
  • Alter table test mem optimize for read

-Thanks

18c Database: RPM Based Database Installations

This is the first post in the series of 18c Database features.

Starting with Oracle Database 18c, you can use the Oracle Preinstallation RPM and the rpm -ivh command to perform an RPM-based single-instance Oracle Database or Oracle Database Client installation.

An RPM-based installation performs preinstallation checks, extracts the database software, reassigns ownership of the extracted software to the preconfigured user and groups, maintains the Oracle inventory, and executes all root operations required to configure the Oracle Database software for a single-instance Oracle Database creation and configuration.

Log in as root.
Install the Oracle Preinstallation RPM to prepare your Oracle Linux machine for the RPM-based Oracle Database installation.

# yum -y install oracle-database-server-18c-preinstall

Access the software download page for Oracle Database RPM-based installation from:

Oracle Technology Network
http://www.oracle.com/technetwork/indexes/downloads/index.html

Oracle Software Delivery Cloud portal (edelivery)
https://edelivery.oracle.com/

Unbreakable Linux Network (ULN)
https://linux.oracle.com/

Download the .rpm file required for performing an RPM-based installation to a directory of your choice. For example, download the oracle-ee-db-18.1.0.0.0-1.x86_64.rpm file to the /tmp directory.

Ensure that the /opt directory is owned by the user oracle and group oinstall.
# ls -l /opt
# chown -R oracle:oinstall /opt

Go to the rpm directory and run the rpm -ivh command to perform the RPM-based installation.

# cd /tmp/rpm
# rpm -ivh oracle_rpm_name
Where oracle_rpm_name is the name of the Oracle Database RPM.

For example:

# cd /tmp/rpm
# rpm -ivh oracle-ee-db-18.1.0.0.0-1.x86_64.rpm

This command creates the Oracle home at the location /opt/oracle/product/18.0.0.0.0-1/dbhome_1.

-Thanks

Suresh


12.1.0.2: PDB Database Save State

In 12.1.0.1, one must have a trigger or script to open all PDB's once the CDB is restarted. But from 12.1.0.2, there is a new option "Save State" for alter pluggable database command.

Let's test it

This is the status of my PDB's

select name,open_mode from v$pdbs;

NAME                           OPEN_MODE
------------------------------ ----------
PDB$SEED                       READ ONLY
PDB3                           READ WRITE
PDB2                           READ WRITE
PDB1                           READ WRITE

SQL> Alter pluggable database PDB3 save state;

for rac

SQL> Alter pluggable database PDB3 save state instances=all;
Next let’s restart the CDB and see the default state of the PDBs.

SQL> shutdown immediate
Database closed.
Database dismounted.
ORACLE instance shut down.
SQL> startup
ORACLE instance started.
...
Database opened.


select name,open_mode from v$pdbs;

NAME                           OPEN_MODE
------------------------------ ----------
PDB$SEED                       READ ONLY
PDB3                           READ WRITE -- only PDB3 has saved state hence its in read write mode.
PDB2                           MOUNTED
PDB1                           MOUNTED


-Thanks

Suresh

Opatch auto fails CRS-6706

Opatchauto failing with error CRS 6706 : Oracle Clusterware Release patch level (‘nnnnnn’) does not match Software patch level (‘nnnnnn’).

This can be due to with two reasons

  1. One of the node in the cluster have different patches than other
  2. The patch level from one node to other is different.

How to find it?

$/u01/app/12.1.0.2/grid/bin/kfod op=patches

$/u01/app/12.1.0.2/grid/bin/kfod op=patchlvl or opatch lsinventory show patch level.

-Thanks

Suresh

Datapatch fails with The pluggable databases that need to be patched must be in upgrade mode

With recent PSU Patch (Jan18) , while runnin datapatch the following issue occurred.

Error: prereq checks failed!
patch 22139226: The pluggable databases that need to be patched must be in upgrade mode
Prereq check failed, exiting without installing any patches.

There is an option called “skip_upgrade_check”  for datapatch.

$ ./datapatch -verbose -skip_upgrade_check
SQL Patching tool version 12.1.0.2.0 Production on Fri Jan 30 20:33:18 2018
Copyright (c) 2012, 2016, Oracle. All rights reserved.

Log file for this invocation: /u01/app/oracle/cfgtoollogs/sqlpatch/sqlpatch_13442_2018_01_30_20_33_18/sqlpatch_invocation.log

Connecting to database...OK
Note: Datapatch will only apply or rollback SQL fixes for PDBs
that are in an open state, no patches will be applied to closed PDBs.
Please refer to Note: Datapatch: Database 12c Post Patch SQL Automation
(Doc ID 1585822.1)
Bootstrapping registry and package to current versions...done
Determining current state...done

Current state of SQL patches:
Patch 22139226 (Database PSU 12.1.0.2.160119, Oracle JavaVM Component (Jan2016)):
Installed in RACTESTPDB only
Patch 27001733 (Database PSU 12.1.0.2.180116, Oracle JavaVM Component (JAN2018)):
Installed in the binary registry and CDB$ROOT PDB$SEED
Bundle series PSU:
ID 180116 in the binary registry and ID 180116 in PDB CDB$ROOT, ID 180116 in PDB PDB$SEED, ID 160419 in PDB RACTESTPDB

Adding patches to installation queue and performing prereq checks...
Installation queue:
For the following PDBs: CDB$ROOT PDB$SEED
Nothing to roll back
Nothing to apply
For the following PDBs: RACTESTPDB
The following patches will be rolled back:
22139226 (Database PSU 12.1.0.2.160119, Oracle JavaVM Component (Jan2016))
The following patches will be applied:
27001733 (Database PSU 12.1.0.2.180116, Oracle JavaVM Component (JAN2018))
26925311 (DATABASE PATCH SET UPDATE 12.1.0.2.180116)

Installing patches...
Patch installation complete. Total patches installed: 3

-Thanks

Suresh

EXPDP Import View as Table

Starting 12c, we can export a view and import it as table instead of view using data pump.
SQL> create view emp_dept as select empno, ename, dept.deptno , dname from   emp, dept  where  emp.deptno=dept.deptno;
View created.

expdp directory=DBA_DATAPUMP dumpfile=test.dmp logfile=test.log VIEWS_AS_TABLES=emp_dept_vw

Processing object type TABLE_EXPORT/VIEWS_AS_TABLES/TABLE_DATA
Total estimation using BLOCKS method: 16 KB
Processing object type TABLE_EXPORT/VIEWS_AS_TABLES/TABLE
. . exported "SCOTT"."EMP_DEPT_VW"                        6.757 KB      14 rows
Master table "SCOTT"."SYS_EXPORT_TABLE_01" successfully loaded/unloaded
******************************************************************************
Dump file set for SCOTT.SYS_EXPORT_TABLE_01 is:
/u01/app/oracle/product/12.1.0.1/test.dmp
Job "SCOTT"."SYS_EXPORT_TABLE_01" successfully completed

Import the dump file.

impdp directory=DBA_DATAPUMP dumpfile=test.dmp logfile=test.log VIEWS_AS_TABLES=emp_dept_vw
Copyright (c) 1982, 2014, Oracle and/or its affiliates.  All rights reserved.
;;;
Connected to: Oracle Database 12c Enterprise Edition Release 12.1.0.2.0 - 64bit Production
With the Partitioning, OLAP, Advanced Analytics and Real Application Testing options
Master table "SCOTT"."SYS_IMPORT_FULL_01" successfully loaded/unloaded
Starting "SCOTT"."SYS_IMPORT_FULL_01":  scott/******** directory=DBA_DATAPUMP dumpfile=empview.dmp
logfile=imp_empview.log
Processing object type TABLE_EXPORT/VIEWS_AS_TABLES/TABLE
Processing object type TABLE_EXPORT/VIEWS_AS_TABLES/TABLE_DATA
. . imported "SCOTT"."EMP_DEPT"                        6.757 KB      14 rows
Job "SCOTT"."SYS_IMPORT_FULL_01" successfully completed

SQL> select object_name,object_type from dba_objects where object_name='EMP_DEPT_VW';

OBJECT_NAME                    OBJECT_TYPE
------------------------------ -----------------------
EMP_DEPT_VW                    TABLE

-Thanks

Suresh

Oracle 12.2 New Feature : Hot Clone PDB using Database Link

Hi,

In release 12.2, we can use database link to clone the PDB.  Here is the example.

SQL> CREATE USER c##clone_dba IDENTIFIED BY clone_dba CONTAINER=ALL;

SQL> GRANT CREATE SESSION, CREATE PLUGGABLE DATABASE TO c##clone_dba CONTAINER=ALL;

SQL> CREATE DATABASE LINK clone_link CONNECT TO c##clone_dba IDENTIFIED BY clone_dba USING 'pdb1';

SQL> CREATE PLUGGABLE DATABASE pdb2 FROM pdb1@clone_link;

CON_ID                KEY_ID

----------------------------------------------------------------------------

3                      AdWnyKVvm092v8GGP7X0a30AAAAAAAAAAAAAAAAAAAAAAAAAAAAA

1                       AVJVz6PQnU+yv1+F60vfGQoAAAAAAAAAAAAAAAAAAAAAAAAAAAAA


-Thanks

Suresh

Docker : Oracle MySQL Container


Assuming you have completed docker installation on windows and registered with oracle container registry, Read first part here if not yet done

This post explain how to create a container for mysql and also show some example of managing container etc. In less than 10 mins mysql database is ready and you can practice what ever you like.

Pull Docker Image and Run the docker with default  options

docker pull container-registry.oracle.com/mysql/community-server

Run the docker with mysql image, I have kept the root password and name of docker is mysql5.7

docker run --name mysql5.7 -e MYSQL_ROOT_PASSWORD=sayit -d container-registry.oracle.com/mysql/community-server:lates

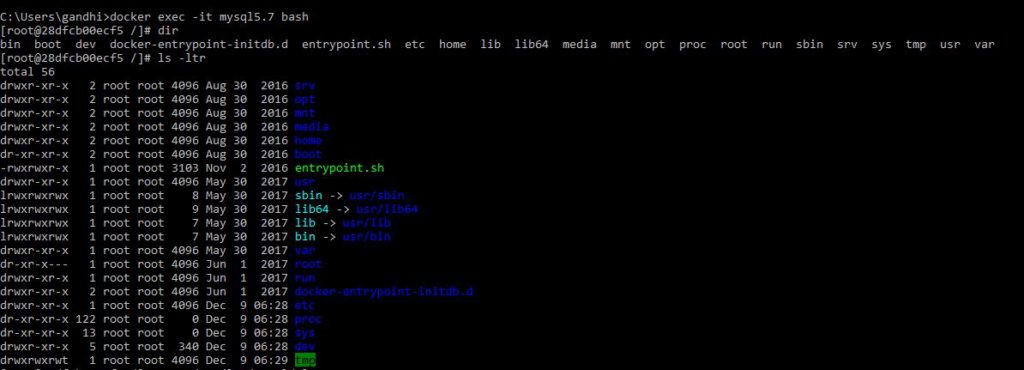
Login to Shell

docker exec -it mysql5.7 bash

mysql1 mysql2 mysql3 mysql4

Getting connected outside from the docker use -p or -P option while run the docker command


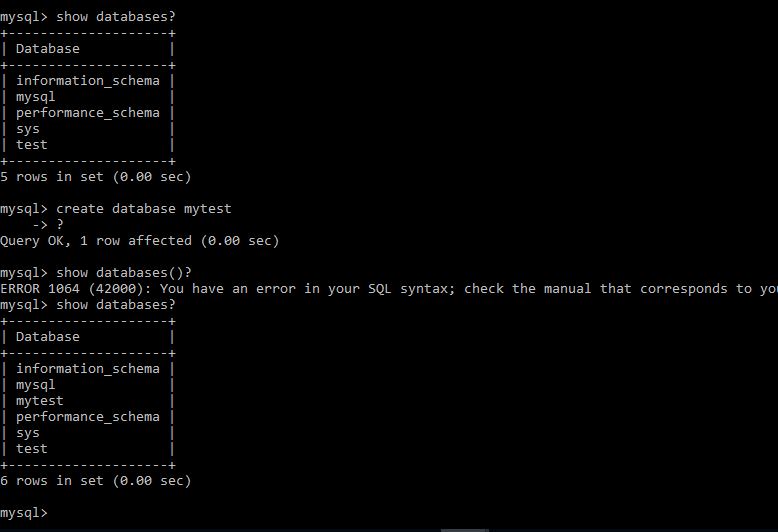
Once logged in , show databases and create databases etc and rest of things will be as usual.

mysql7


Stop docker container

docker stop mysql5.7

mysql5

Start docker container

docker start mysql5.7

mysql6


Remove docker container, you can use -f option to forcefully delete the running docker

docker rm mysql5.6 -f 


Further, if you want to keep any additional parameter you can use a cnf file and run the docker run command, this file will replace the cnf file in the docker container 🙂

The MySQL startup configuration in these Docker images is specified in the file /etc/my.cnf. If you want to customize this configuration for your own purposes, you can create your alternative configuration file in a directory on the host machine and then mount this file in the appropriate location inside the MySQL container, effectively replacing the standard configuration file.

If you want to base your changes on the standard configuration file, start your MySQL container in the standard way described above, then do:
docker exec -it my-container-name cat /etc/my.cnf > /my/custom/config-file
… where ´/my/custom/config-file´ is the path and name of the new configuration file. Then start a new MySQL container like this:
docker run --name my-new-container-name -v /my/custom/config-file:/etc/my.cnf -e MYSQL_ROOT_PASSWORD=my-secret-pw -d container-registry.oracle.com/mysql/community-server:tag


Docker : Oracle Weblogic Container

Hello

Assuming you have done the installation of docker and registered to container registry. This post elaborates the weblogic docker usage and how to see logs and manage weblogic. At last of this post I will also show you to run some examples to create additional domain /servers etc with docker samples.

In less than 20 mins (download time), the weblogic server with Admin server is ready for use, Cool isnt it 🙂

 Pull the docker image from the container registry

 $docker pull container-registry.oracle.com/middleweare/weblogic

wl2


$docker run -d container-registry.oracle.com/middleware/weblogic:latest

wl1


Get the logs, so you can get password

C:\Users\gandhi>docker logs 21054365ed941fc0f2cc1e4742adf50fa767ab63ea813d26f4634e1f4027774a

Password does not Match the criteria, re-generating...

Oracle WebLogic Server Auto Generated Empty Domain:

----> 'weblogic' admin password: qw1mAUIu
Initializing WebLogic Scripting Tool (WLST) ...

Welcome to WebLogic Server Administration Scripting Shell

Type help() for help on available commands

domain_name : [base_domain]
admin_port : [7001]
domain_path : [/u01/oracle/user_projects/domains/base_domain]
production_mode : [prod]
admin password : [qw1mAUIu]
admin name : [AdminServer]
admin username : [weblogic]
Exiting WebLogic Scripting Tool.

.
.
JAVA Memory arguments: -Djava.security.egd=file:/dev/./urandom
.
CLASSPATH=/usr/java/jdk1.8.0_151/lib/tools.jar:/u01/oracle/wlserver/server/lib/weblogic.jar:/u01/oracle/wlserver/../oracle_common/modules/thirdparty/ant-contrib-1.0b3.jar:/u01/oracle/wlserver/modules/features/oracle.wls.common.nodemanager.jar::/u01/oracle/wlserver/common/derby/lib/derbynet.jar:/u01/oracle/wlserver/common/derby/lib/derbyclient.jar:/u01/oracle/wlserver/common/derby/lib/derby.jar
.
PATH=/u01/oracle/user_projects/domains/base_domain/bin:/u01/oracle/wlserver/server/bin:/u01/oracle/wlserver/../oracle_common/modules/thirdparty/org.apache.ant/1.9.8.0.0/apache-ant-1.9.8/bin:/usr/java/jdk1.8.0_151/jre/bin:/usr/java/jdk1.8.0_151/bin:/usr/local/sbin:/usr/local/bin:/usr/sbin:/usr/bin:/sbin:/bin:/usr/java/default/bin:/u01/oracle/oracle_common/common/bin:/u01/oracle/wlserver/common/bin
.
***************************************************
* To start WebLogic Server, use a username and *
* password assigned to an admin-level user. For *
* server administration, use the WebLogic Server *
* console at http://hostname:port/console *
***************************************************
Starting WLS with line:
/usr/java/jdk1.8.0_151/bin/java -server -Djava.security.egd=file:/dev/./urandom -cp /u01/oracle/wlserver/server/lib/weblogic-launcher.jar -Dlaunch.use.env.classpath=true -Dweblogic.Name=AdminServer -Djava.security.policy=/u01/oracle/wlserver/server/lib/weblogic.policy -Dweblogic.ProductionModeEnabled=true -Djava.system.class.loader=com.oracle.classloader.weblogic.LaunchClassLoader -javaagent:/u01/oracle/wlserver/server/lib/debugpatch-agent.jar -da -Dwls.home=/u01/oracle/wlserver/server -Dweblogic.home=/u01/oracle/wlserver/server weblogic.Server
<Dec 9, 2017 8:22:17 AM GMT> <Info> <Security> <BEA-090905> <Disabling the CryptoJ JCE Provider self-integrity check for better startup performance. To enable this check, specify -Dweblogic.security.allowCryptoJDefaultJCEVerification=true.>
<Dec 9, 2017 8:22:17 AM GMT> <Info> <Security> <BEA-090906> <Changing the default Random Number Generator in RSA CryptoJ from ECDRBG128 to HMACDRBG. To disable this change, specify -Dweblogic.security.allowCryptoJDefaultPRNG=true.>
<Dec 9, 2017 8:22:18 AM GMT> <Info> <WebLogicServer> <BEA-000377> <Starting WebLogic Server with Java HotSpot(TM) 64-Bit Server VM Version 25.151-b12 from Oracle Corporation.>
<Dec 9, 2017 8:22:18 AM GMT> <Info> <RCM> <BEA-2165021> <"ResourceManagement" is not enabled in this JVM. Enable "ResourceManagement" to use the WebLogic Server "Resource Consumption Management" feature. To enable "ResourceManagement", you must specify the following JVM options in the WebLogic Server instance in which the JVM runs: -XX:+UnlockCommercialFeatures -XX:+ResourceManagement.>
<Dec 9, 2017 8:22:18 AM GMT> <Info> <Management> <BEA-141107> <Version: WebLogic Server 12.2.1.3.0 Thu Aug 17 13:39:49 PDT 2017 1882952>
<Dec 9, 2017 8:22:20 AM GMT> <Notice> <WebLogicServer> <BEA-000365> <Server state changed to STARTING.>
<Dec 9, 2017 8:22:20 AM GMT> <Info> <WorkManager> <BEA-002900> <Initializing self-tuning thread pool.>
<Dec 9, 2017 8:22:20 AM GMT> <Info> <WorkManager> <BEA-002942> <CMM memory level becomes 0. Setting standby thread pool size to 256.>
<Dec 9, 2017 8:22:20,982 AM GMT> <Notice> <Log Management> <BEA-170019> <The server log file weblogic.logging.FileStreamHandler instance=1527301193
Current log file=/u01/oracle/user_projects/domains/base_domain/servers/AdminServer/logs/AdminServer.log
Rotation dir=/u01/oracle/user_projects/domains/base_domain/servers/AdminServer/logs
is opened. All server side log events will be written to this file.>
<Dec 9, 2017 8:22:21,190 AM GMT> <Notice> <Security> <BEA-090946> <Security pre-initializing using security realm: myrealm>
<Dec 9, 2017 8:22:21,874 AM GMT> <Notice> <Security> <BEA-090947> <Security post-initializing using security realm: myrealm>
<Dec 9, 2017 8:22:22,861 AM GMT> <Notice> <Security> <BEA-090082> <Security initialized using administrative security realm: myrealm>
<Dec 9, 2017 8:22:23,127 AM GMT> <Notice> <Security> <BEA-090083> <Storing boot identity in the file: /u01/oracle/user_projects/domains/base_domain/servers/AdminServer/security/boot.properties.>
<Dec 9, 2017 8:22:23,455 AM GMT> <Notice> <JMX> <BEA-149512> <JMX Connector Server started at service:jmx:iiop://172.17.0.5:7001/jndi/weblogic.management.mbeanservers.runtime.>
<Dec 9, 2017 8:22:23,844 AM GMT> <Notice> <JMX> <BEA-149512> <JMX Connector Server started at service:jmx:iiop://172.17.0.5:7001/jndi/weblogic.management.mbeanservers.domainruntime.>
<Dec 9, 2017 8:22:23,860 AM GMT> <Notice> <JMX> <BEA-149512> <JMX Connector Server started at service:jmx:iiop://172.17.0.5:7001/jndi/weblogic.management.mbeanservers.edit.>
<Dec 9, 2017 8:22:25,210 AM GMT> <Notice> <WebLogicServer> <BEA-000365> <Server state changed to STANDBY.>
<Dec 9, 2017 8:22:25,212 AM GMT> <Notice> <WebLogicServer> <BEA-000365> <Server state changed to STARTING.>
<Dec 9, 2017 8:22:25,275 AM GMT> <Notice> <Log Management> <BEA-170036> <The Logging monitoring service timer has started to check for logged message counts every 30 seconds.>
<Dec 9, 2017 8:22:29,116 AM GMT> <Notice> <Log Management> <BEA-170027> <The server has successfully established a connection with the Domain level Diagnostic Service.>
<Dec 9, 2017 8:22:30,192 AM GMT> <Notice> <WebLogicServer> <BEA-000365> <Server state changed to ADMIN.>
<Dec 9, 2017 8:22:30,286 AM GMT> <Notice> <WebLogicServer> <BEA-000365> <Server state changed to RESUMING.>
<Dec 9, 2017 8:22:30,382 AM GMT> <Notice> <Server> <BEA-002613> <Channel "Default[1]" is now listening on 127.0.0.1:7001 for protocols iiop, t3, ldap, snmp, http.>
<Dec 9, 2017 8:22:30,386 AM GMT> <Notice> <Server> <BEA-002613> <Channel "Default" is now listening on 172.17.0.5:7001 for protocols iiop, t3, ldap, snmp, http.>
<Dec 9, 2017 8:22:30,390 AM GMT> <Notice> <Server> <BEA-002613> <Channel "Default[1]" is now listening on 127.0.0.1:7001 for protocols iiop, t3, ldap, snmp, http.>
<Dec 9, 2017 8:22:30,390 AM GMT> <Notice> <WebLogicServer> <BEA-000329> <Started the WebLogic Server Administration Server "AdminServer" for domain "base_domain" running in production mode.>
<Dec 9, 2017 8:22:30,390 AM GMT> <Notice> <Server> <BEA-002613> <Channel "Default" is now listening on 172.17.0.5:7001 for protocols iiop, t3, ldap, snmp, http.>
<Dec 9, 2017 8:22:30,395 AM GMT> <Notice> <WebLogicServer> <BEA-000360> <The server started in RUNNING mode.>
<Dec 9, 2017 8:22:30,410 AM GMT> <Notice> <WebLogicServer> <BEA-000365> <Server state changed to RUNNING.>


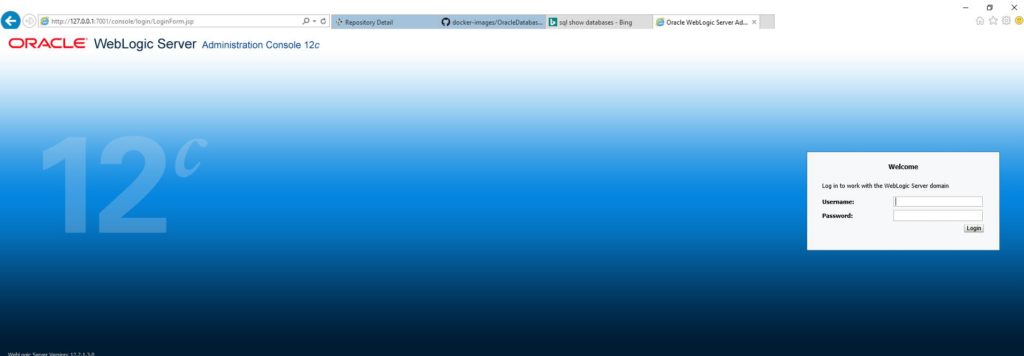
Then go to your browser and type http://127.0.0.1:7001/console , then weblogic admin console will be appeared.

wl3


Oracle Container Registry – Docker for Oracle Databases

Hello All,

This post is about how to use Docker and utilize oracle container registry i.e oracle official docker hub.

Until now,I am using open source/public docker images from dockerhub, Today I had a final look on Oracle Container Registry which having Official Oracle Docker Images with different products like FMW,Database,Goldengate,Java, Coherence,Weblogic.

These two locations we can find Oracle Docker Images

  1. https://container-registry.oracle.com
  2. https://store.docker.com/search?certification_status=certified&q=oracle&source=verified&type=image

And there is github official repository as well.

  1. https://github.com/oracle/docker-images

Those who are not familiar with docker, its just simple. All of us are using Oracle Virtual Box/VM etc for Virtualization, how ever  if you want to use a virtual box first you need to install the OS on virtual machine, in Docker, your host OS is shared among all other containers (aka virtual images) or the docker image will have its own OS too. All you need Install docker, download image, run the image. Thats it. :). I will write a post on managing docker separately .

Let's have a quick install and look at container-registry.

Install docker for windows using following link (You need to have virtualisation enabled in your machine)

https://store.docker.com/editions/community/docker-ce-desktop-windows

Then log into https://container-registry.oracle.com with your single sign on account.
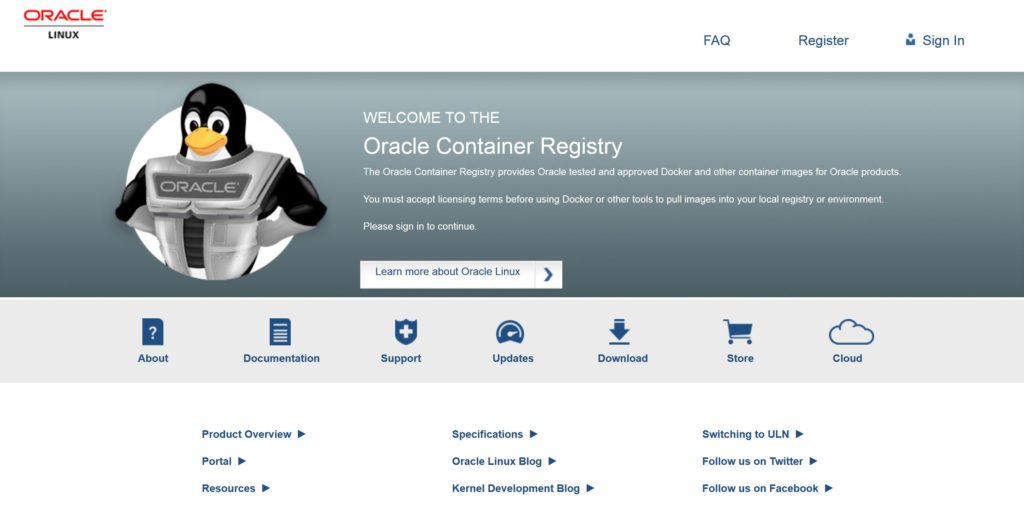
containerregistry1


containerregistry2

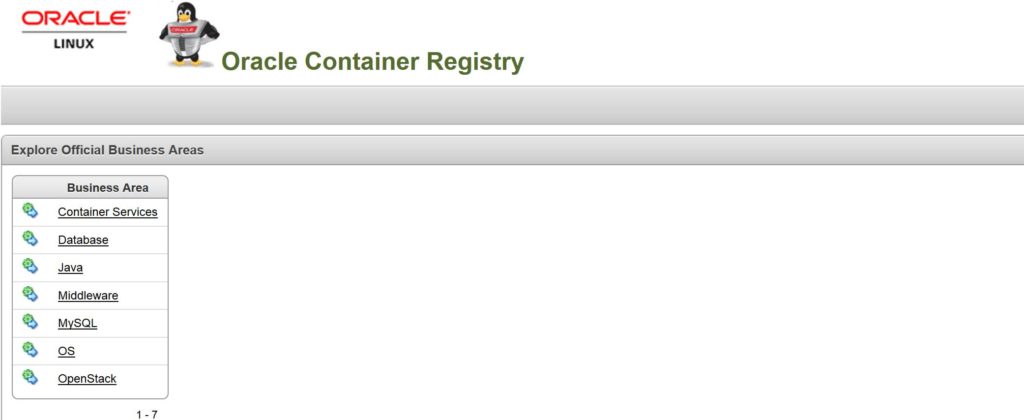
As you see above Coherance, Databases, Java,Middleware,MySQL, OS and Openstack are the current categogies and docker images available. Click on the Databases.


There you find the enterprise,standard, instant client for oracle database. click on any enterprise or standard, you will be asked to accept terms and conditions, You click on continuebutton, on the right of the following screen. I already accepted hence I do not have it to show you
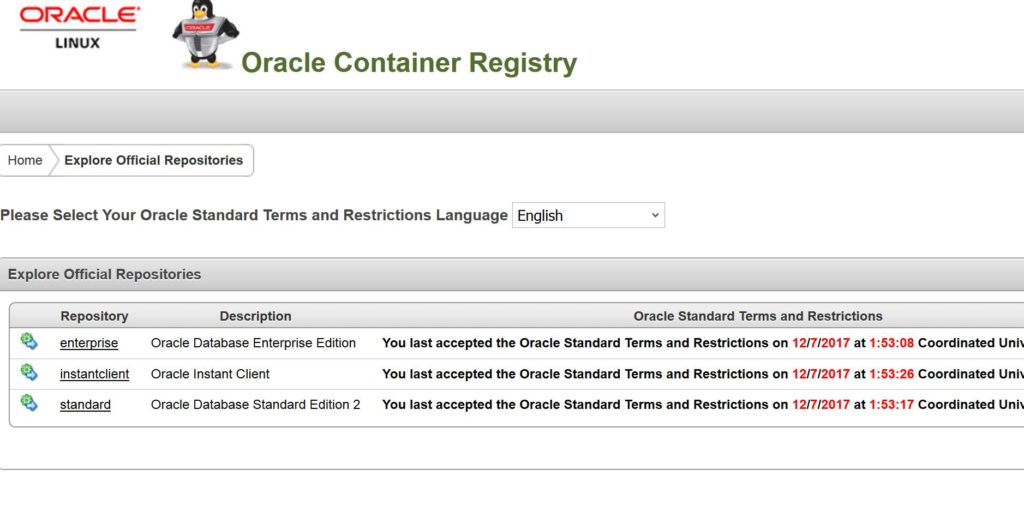
 

containerregistrydb1


Currently with Oracle database the following limitations are there

  1. This Docker image release supports only single database instance.
  2. Dataguard feature is not supported.

When you click on the enterprise again you will be open with documentation how you can use this image.
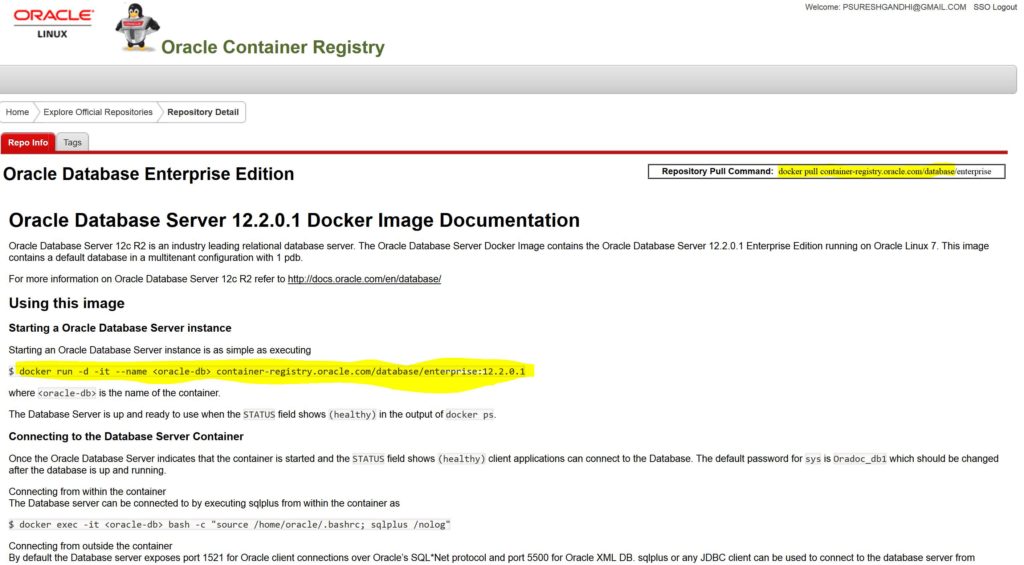
 

containerregistrydb2


The highlighted are the two commands really you need to do to get a database up and running. (You must have a decent internet connection to download the 2.5gb of database image).

At this point, you have installed docker and you have container-registry account.

Open a command prompt and pull the docker image first. It will prompt you to login your sso account. While pulling the image if you receive access denied error that means you have not accepted the terms and conditions in browser, accept it and then pull again.


Once you pulled the images, run using,

docker pull container-registry.oracle.com/database/enterprise

donwload-enterprise-docker

For standard edition use ,

docker pull container-registry.oracle.com/database/standard

donwload-standard-docker

This will take time to download, once downloaded, run the image with, Just run the docker image without options,

Just run without options

docker run -d -it --name orcl12c container-registry.oracle.com/database/enterprise:12.2.0.1

Login to docker for sqlplus

docker exec -it orcl12c bash -c "source /home/oracle/.bashrc; sqlplus /nolog"

Run the image to ensure the database is accessible outside container -p is used

docker run -d -it --name orcl12c -P container-registry.oracle.com/database/enterprise:12.2.0.1

If you want to set options and few other params for databases run the following block, This will use this options, SID, PDB Name, Password and Characterset , lets run this one

docker run --name orcl12cr2 -p 1521:1521 -p 5500:5500 -e ORACLE_SID=ORCL12C -e ORACLE_PDB=PDB1  -e ORACLE_PWD=admin123 -e ORACLE_CHARACTERSET=AL32UTF8 -  container-registry.oracle.com/database/enterprise:12.2.0.1

Screen output

Setup Oracle Database
Oracle Database 12.2.0.1 Setup
Sat Dec 9 11:07:23 UTC 2017

Check parameters ......
log file is : /home/oracle/setup/log/paramChk.log
paramChk.sh is done at 0 sec

untar DB bits ......
log file is : /home/oracle/setup/log/untarDB.log
untarDB.sh is done at 59 sec

config DB ......
log file is : /home/oracle/setup/log/configDB.log
Sat Dec 9 11:08:22 UTC 2017
Start Docker DB configuration
Call configDBora.sh to configure database
Sat Dec 9 11:08:22 UTC 2017
Configure DB as oracle user
Setup Database directories ...

SQL*Plus: Release 12.2.0.1.0 Production on Sat Dec 9 11:08:22 2017

Copyright (c) 1982, 2016, Oracle. All rights reserved.

Connected to an idle instance.

SQL>
File created.

SQL> ORACLE instance started.

Total System Global Area 1342177280 bytes
Fixed Size 8792536 bytes
Variable Size 352323112 bytes
Database Buffers 973078528 bytes
Redo Buffers 7983104 bytes
Database mounted.
Database opened.
SQL>
Database altered.

SQL>
NAME TYPE VALUE
------------------------------------ ----------- ------------------------------
spfile string /u01/app/oracle/product/12.2.0
/dbhome_1/dbs/spfileORCLCDB.or
a
SQL>
NAME TYPE VALUE
------------------------------------ ----------- ------------------------------
encrypt_new_tablespaces string CLOUD_ONLY
SQL>
User altered.

SQL>
User altered.

SQL> Disconnected from Oracle Database 12c Enterprise Edition Release 12.2.0.1.0 - 64bit Production
update password

Enter password for SYS:
create pdb : ORCLPDB1

SQL*Plus: Release 12.2.0.1.0 Production on Sat Dec 9 11:08:42 2017

Copyright (c) 1982, 2016, Oracle. All rights reserved.

Connected to:
Oracle Database 12c Enterprise Edition Release 12.2.0.1.0 - 64bit Production

SQL> 2 3 4 5
Pluggable database created.

SQL>
Pluggable database altered.

SQL>
Pluggable database altered.

SQL> Disconnected from Oracle Database 12c Enterprise Edition Release 12.2.0.1.0 - 64bit Production
Reset Database parameters

SQL*Plus: Release 12.2.0.1.0 Production on Sat Dec 9 11:08:52 2017

Copyright (c) 1982, 2016, Oracle. All rights reserved.

Connected to:
Oracle Database 12c Enterprise Edition Release 12.2.0.1.0 - 64bit Production

SQL>
System altered.

SQL> Disconnected from Oracle Database 12c Enterprise Edition Release 12.2.0.1.0 - 64bit Production

LSNRCTL for Linux: Version 12.2.0.1.0 - Production on 09-DEC-2017 11:08:52

Copyright (c) 1991, 2016, Oracle. All rights reserved.

Starting /u01/app/oracle/product/12.2.0/dbhome_1/bin/tnslsnr: please wait...

TNSLSNR for Linux: Version 12.2.0.1.0 - Production
System parameter file is /u01/app/oracle/product/12.2.0/dbhome_1/admin/ORCLCDB/listener.ora
Log messages written to /u01/app/oracle/diag/tnslsnr/a3d65060e96e/listener/alert/log.xml
Listening on: (DESCRIPTION=(ADDRESS=(PROTOCOL=tcp)(HOST=0.0.0.0)(PORT=1521)))
Listening on: (DESCRIPTION=(ADDRESS=(PROTOCOL=ipc)(KEY=EXTPROC1521)))

Connecting to (DESCRIPTION=(ADDRESS=(PROTOCOL=TCP)(HOST=0.0.0.0)(PORT=1521)))
STATUS of the LISTENER
------------------------
Alias LISTENER
Version TNSLSNR for Linux: Version 12.2.0.1.0 - Production
Start Date 09-DEC-2017 11:08:53
Uptime 0 days 0 hr. 0 min. 1 sec
Trace Level off
Security ON: Local OS Authentication
SNMP OFF
Listener Parameter File /u01/app/oracle/product/12.2.0/dbhome_1/admin/ORCLCDB/listener.ora
Listener Log File /u01/app/oracle/diag/tnslsnr/a3d65060e96e/listener/alert/log.xml
Listening Endpoints Summary...
(DESCRIPTION=(ADDRESS=(PROTOCOL=tcp)(HOST=0.0.0.0)(PORT=1521)))
(DESCRIPTION=(ADDRESS=(PROTOCOL=ipc)(KEY=EXTPROC1521)))
The listener supports no services
The command completed successfully

DONE!
Remove password info
Docker DB configuration is complete !
configDB.sh is done at 90 sec

Done ! The database is ready for use .
# ===========================================================================
# == Add below entries to your tnsnames.ora to access this database server ==
# ====================== from external host =================================
ORCLCDB=(DESCRIPTION=(ADDRESS=(PROTOCOL=TCP)(HOST=<ip-address>)(PORT=<port>))
(CONNECT_DATA=(SERVER=DEDICATED)(SERVICE_NAME=ORCLCDB.localdomain)))
ORCLPDB1=(DESCRIPTION=(ADDRESS=(PROTOCOL=TCP)(HOST=<ip-address>)(PORT=<port>))
(CONNECT_DATA=(SERVER=DEDICATED)(SERVICE_NAME=ORCLPDB1.localdomain)))
#
#ip-address : IP address of the host where the container is running.
#port : Host Port that is mapped to the port 1521 of the container.
#
# The mapped port can be obtained from running "docker port <container-id>"
# ===========================================================================
ORCLPDB1(3):Database Characterset for ORCLPDB1 is AL32UTF8
ORCLPDB1(3):Opatch validation is skipped for PDB ORCLPDB1 (con_id=0)
2017-12-09T11:08:52.480340+00:00
ORCLPDB1(3):Opening pdb with no Resource Manager plan active
Pluggable database ORCLPDB1 opened read write
Completed: alter pluggable database ORCLPDB1 open
alter pluggable database all save state
Completed: alter pluggable database all save state
2017-12-09T11:08:52.666801+00:00
ALTER SYSTEM SET encrypt_new_tablespaces='DDL' SCOPE=BOTH;
2017-12-09T11:09:40.915047+00:00
TABLE SYS.WRP$_REPORTS: ADDED INTERVAL PARTITION SYS_P287 (2900) VALUES LESS THAN (TO_DATE(' 2017-12-10 01:00:00', 'SYYYY-MM-DD HH24:MI:SS', 'NLS_CALENDAR=GREGORIAN'))
TABLE SYS.WRP$_REPORTS_DETAILS: ADDED INTERVAL PARTITION SYS_P288 (2900) VALUES LESS THAN (TO_DATE(' 2017-12-10 01:00:00', 'SYYYY-MM-DD HH24:MI:SS', 'NLS_CALENDAR=GREGORIAN'))
2017-12-09T11:09:41.026256+00:00
Thread 1 advanced to log sequence 5 (LGWR switch)
Current log# 2 seq# 5 mem# 0: /u04/app/oracle/redo/redo002.log
TABLE SYS.WRP$_REPORTS_TIME_BANDS: ADDED INTERVAL PARTITION SYS_P291 (2899) VALUES LESS THAN (TO_DATE(' 2017-12-09 01:00:00', 'SYYYY-MM-DD HH24:MI:SS', 'NLS_CALENDAR=GREGORIAN'))

Find the tns details using

docker port oracleDB

C:\Users\gandhi>docker port orcl12cr2
1521/tcp -> 0.0.0.0:1521
5500/tcp -> 0.0.0.0:5500

Then connect using sqlplus, but in order to work connection outside of container works you must run the container with -P or -p option and the default sys password is Oracdoc_db1

sqlplus sys/Oradoc_db1@ORCLCDB as sysdba
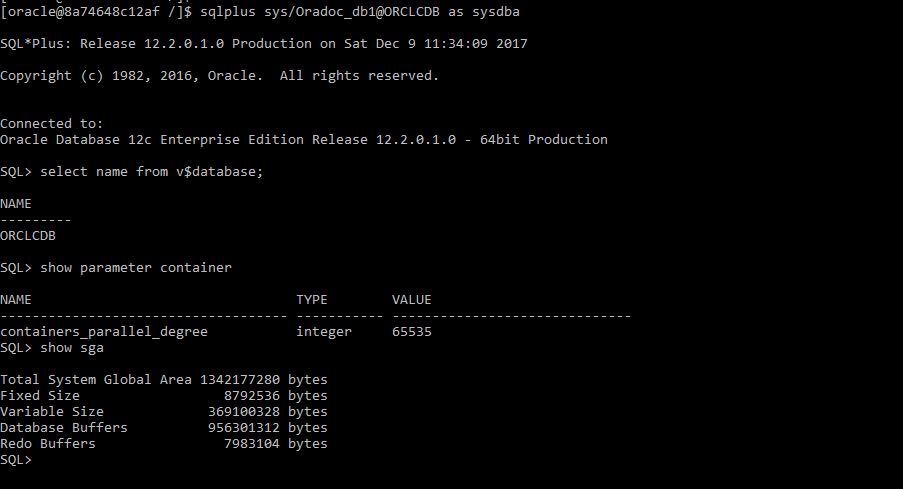
dockersqlplus

Let's look at environment, the filesystem and enviornment variables inside the container

docker exec -it orcl12cr2 bash
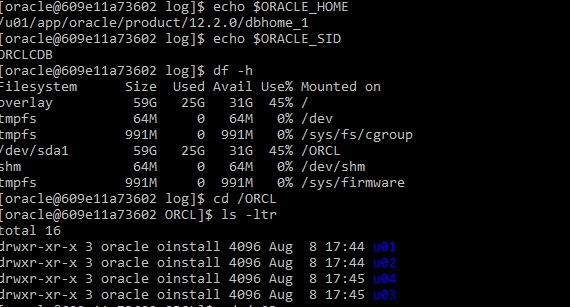
env


Let's check the alert log, docker has option logs, which shows alert log, and also you can tail it using -f and since how many mins you want ,

docker logs orcl12cr2 -f --since 10m
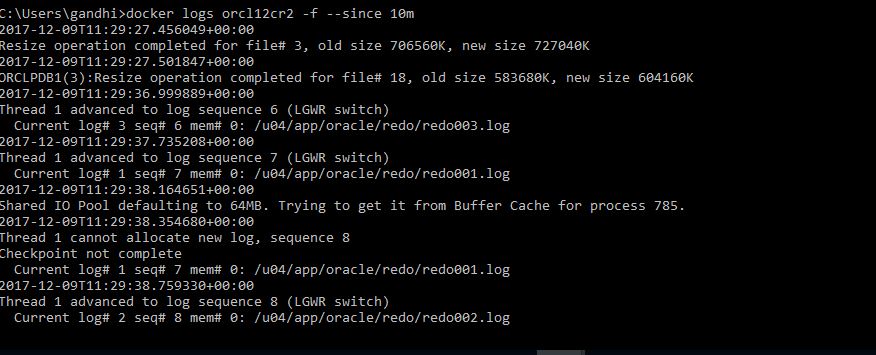
alertlogcheck

For your knowledge purpose , /home/oracle/setup/ contains all the files that docker use for setup etc.

Hope you liked it, Dockers provides much quicker provisioning and provides flexibility and feasibility for a devops model in database domain.

Next post we will be seeing Oracle Container for MySQL and Weblogic

-Thanks

Suresh