Subscribe to Posts by Email

Subscriber Count

    705

Disclaimer

All information is offered in good faith and in the hope that it may be of use for educational purpose and for Database community purpose, but is not guaranteed to be correct, up to date or suitable for any particular purpose. db.geeksinsight.com accepts no liability in respect of this information or its use. This site is independent of and does not represent Oracle Corporation in any way. Oracle does not officially sponsor, approve, or endorse this site or its content and if notify any such I am happy to remove. Product and company names mentioned in this website may be the trademarks of their respective owners and published here for informational purpose only. This is my personal blog. The views expressed on these pages are mine and learnt from other blogs and bloggers and to enhance and support the DBA community and this web blog does not represent the thoughts, intentions, plans or strategies of my current employer nor the Oracle and its affiliates or any other companies. And this website does not offer or take profit for providing these content and this is purely non-profit and for educational purpose only. If you see any issues with Content and copy write issues, I am happy to remove if you notify me. Contact Geek DBA Team, via geeksinsights@gmail.com

Pages

18c Database : Private Temporary Tables

Starting 18c, we can create private temporary tables which can be visible to the session that created it using "Create Private temporary table" command.

Following are use cases for private temporary tables

  • When an application stores temporary data in transient tables that are populated once, read few times, and then dropped at the end of a transaction or session
  • When a session is maintained indefinitely and must create different temporary tables for different transactions
  • When the creation of a temporary table must not start a new transaction or commit an existing transaction
  • When different sessions of the same user must use the same name for a temporary table
  • When a temporary table is required for a read-only databaseNote: Names of private temporary tables must be prefixed according to the initialization parameter private_temp_table_prefix.

This statement creates a private temporary table that is transaction specific:

CREATE PRIVATE TEMPORARY TABLE GEEK$PTT_test_transaction (time_id DATE, amount_sold NUMBER(10,2)) ON COMMIT DROP DEFINITION;

This statement creates a private temporary table that is session specific:

CREATE PRIVATE TEMPORARY TABLE GEEK$PTT_test_session (time_id DATE, amount_sold NUMBER(10,2)) ON COMMIT PRESERVE DEFINITION;

-Thanks

Geek DBA

18c Database : MEMOPTIMIZE_POOL_SIZE in SGA

Starting 18c, A new pool is introduced in SGA called MemOptimize pool to store the frequently access tables (in other words pin your tables in buffer cache) via primary key values. The Memoptimized Rowstore (pool) uses a memory area in the system global area (SGA) called the memoptimize pool that stores the hash indexes of the tables when enabled for fast lookup.

For Fast look up of the tables you must,

  • Have a primary key on the table
  • No compression is used on the table

When you set Memoptimize_pool_size to a non zero value that much size is allocated to memoptimize store from SGA. So you must be careful while setting this as it takes away the memory from SGA.

You can use alter system set memoptimize_pool_size=n scope=spfile to set the parameter. Note this parameter is not dynamic and required database restart.

To enable memoptimize on tables , you can use create/alter table statement with optimize for read option.

  • create table test (id number primary key, name varchar2(10)) mem optimize for read segment creation immediate;
  • Alter table test mem optimize for read

-Thanks

18c Database: RPM Based Database Installations

This is the first post in the series of 18c Database features.

Starting with Oracle Database 18c, you can use the Oracle Preinstallation RPM and the rpm -ivh command to perform an RPM-based single-instance Oracle Database or Oracle Database Client installation.

An RPM-based installation performs preinstallation checks, extracts the database software, reassigns ownership of the extracted software to the preconfigured user and groups, maintains the Oracle inventory, and executes all root operations required to configure the Oracle Database software for a single-instance Oracle Database creation and configuration.

Log in as root.
Install the Oracle Preinstallation RPM to prepare your Oracle Linux machine for the RPM-based Oracle Database installation.

# yum -y install oracle-database-server-18c-preinstall

Access the software download page for Oracle Database RPM-based installation from:

Oracle Technology Network
http://www.oracle.com/technetwork/indexes/downloads/index.html

Oracle Software Delivery Cloud portal (edelivery)
https://edelivery.oracle.com/

Unbreakable Linux Network (ULN)
https://linux.oracle.com/

Download the .rpm file required for performing an RPM-based installation to a directory of your choice. For example, download the oracle-ee-db-18.1.0.0.0-1.x86_64.rpm file to the /tmp directory.

Ensure that the /opt directory is owned by the user oracle and group oinstall.
# ls -l /opt
# chown -R oracle:oinstall /opt

Go to the rpm directory and run the rpm -ivh command to perform the RPM-based installation.

# cd /tmp/rpm
# rpm -ivh oracle_rpm_name
Where oracle_rpm_name is the name of the Oracle Database RPM.

For example:

# cd /tmp/rpm
# rpm -ivh oracle-ee-db-18.1.0.0.0-1.x86_64.rpm

This command creates the Oracle home at the location /opt/oracle/product/18.0.0.0.0-1/dbhome_1.

-Thanks

Suresh


12.1.0.2: PDB Database Save State

In 12.1.0.1, one must have a trigger or script to open all PDB's once the CDB is restarted. But from 12.1.0.2, there is a new option "Save State" for alter pluggable database command.

Let's test it

This is the status of my PDB's

select name,open_mode from v$pdbs;

NAME                           OPEN_MODE
------------------------------ ----------
PDB$SEED                       READ ONLY
PDB3                           READ WRITE
PDB2                           READ WRITE
PDB1                           READ WRITE

SQL> Alter pluggable database PDB3 save state;

for rac

SQL> Alter pluggable database PDB3 save state instances=all;
Next let’s restart the CDB and see the default state of the PDBs.

SQL> shutdown immediate
Database closed.
Database dismounted.
ORACLE instance shut down.
SQL> startup
ORACLE instance started.
...
Database opened.


select name,open_mode from v$pdbs;

NAME                           OPEN_MODE
------------------------------ ----------
PDB$SEED                       READ ONLY
PDB3                           READ WRITE -- only PDB3 has saved state hence its in read write mode.
PDB2                           MOUNTED
PDB1                           MOUNTED


-Thanks

Suresh

Opatch auto fails CRS-6706

Opatchauto failing with error CRS 6706 : Oracle Clusterware Release patch level (‘nnnnnn’) does not match Software patch level (‘nnnnnn’).

This can be due to with two reasons

  1. One of the node in the cluster have different patches than other
  2. The patch level from one node to other is different.

How to find it?

$/u01/app/12.1.0.2/grid/bin/kfod op=patches

$/u01/app/12.1.0.2/grid/bin/kfod op=patchlvl or opatch lsinventory show patch level.

-Thanks

Suresh

Datapatch fails with The pluggable databases that need to be patched must be in upgrade mode

With recent PSU Patch (Jan18) , while runnin datapatch the following issue occurred.

Error: prereq checks failed!
patch 22139226: The pluggable databases that need to be patched must be in upgrade mode
Prereq check failed, exiting without installing any patches.

There is an option called “skip_upgrade_check”  for datapatch.

$ ./datapatch -verbose -skip_upgrade_check
SQL Patching tool version 12.1.0.2.0 Production on Fri Jan 30 20:33:18 2018
Copyright (c) 2012, 2016, Oracle. All rights reserved.

Log file for this invocation: /u01/app/oracle/cfgtoollogs/sqlpatch/sqlpatch_13442_2018_01_30_20_33_18/sqlpatch_invocation.log

Connecting to database...OK
Note: Datapatch will only apply or rollback SQL fixes for PDBs
that are in an open state, no patches will be applied to closed PDBs.
Please refer to Note: Datapatch: Database 12c Post Patch SQL Automation
(Doc ID 1585822.1)
Bootstrapping registry and package to current versions...done
Determining current state...done

Current state of SQL patches:
Patch 22139226 (Database PSU 12.1.0.2.160119, Oracle JavaVM Component (Jan2016)):
Installed in RACTESTPDB only
Patch 27001733 (Database PSU 12.1.0.2.180116, Oracle JavaVM Component (JAN2018)):
Installed in the binary registry and CDB$ROOT PDB$SEED
Bundle series PSU:
ID 180116 in the binary registry and ID 180116 in PDB CDB$ROOT, ID 180116 in PDB PDB$SEED, ID 160419 in PDB RACTESTPDB

Adding patches to installation queue and performing prereq checks...
Installation queue:
For the following PDBs: CDB$ROOT PDB$SEED
Nothing to roll back
Nothing to apply
For the following PDBs: RACTESTPDB
The following patches will be rolled back:
22139226 (Database PSU 12.1.0.2.160119, Oracle JavaVM Component (Jan2016))
The following patches will be applied:
27001733 (Database PSU 12.1.0.2.180116, Oracle JavaVM Component (JAN2018))
26925311 (DATABASE PATCH SET UPDATE 12.1.0.2.180116)

Installing patches...
Patch installation complete. Total patches installed: 3

-Thanks

Suresh

EXPDP Import View as Table

Starting 12c, we can export a view and import it as table instead of view using data pump.
SQL> create view emp_dept as select empno, ename, dept.deptno , dname from   emp, dept  where  emp.deptno=dept.deptno;
View created.

expdp directory=DBA_DATAPUMP dumpfile=test.dmp logfile=test.log VIEWS_AS_TABLES=emp_dept_vw

Processing object type TABLE_EXPORT/VIEWS_AS_TABLES/TABLE_DATA
Total estimation using BLOCKS method: 16 KB
Processing object type TABLE_EXPORT/VIEWS_AS_TABLES/TABLE
. . exported "SCOTT"."EMP_DEPT_VW"                        6.757 KB      14 rows
Master table "SCOTT"."SYS_EXPORT_TABLE_01" successfully loaded/unloaded
******************************************************************************
Dump file set for SCOTT.SYS_EXPORT_TABLE_01 is:
/u01/app/oracle/product/12.1.0.1/test.dmp
Job "SCOTT"."SYS_EXPORT_TABLE_01" successfully completed

Import the dump file.

impdp directory=DBA_DATAPUMP dumpfile=test.dmp logfile=test.log VIEWS_AS_TABLES=emp_dept_vw
Copyright (c) 1982, 2014, Oracle and/or its affiliates.  All rights reserved.
;;;
Connected to: Oracle Database 12c Enterprise Edition Release 12.1.0.2.0 - 64bit Production
With the Partitioning, OLAP, Advanced Analytics and Real Application Testing options
Master table "SCOTT"."SYS_IMPORT_FULL_01" successfully loaded/unloaded
Starting "SCOTT"."SYS_IMPORT_FULL_01":  scott/******** directory=DBA_DATAPUMP dumpfile=empview.dmp
logfile=imp_empview.log
Processing object type TABLE_EXPORT/VIEWS_AS_TABLES/TABLE
Processing object type TABLE_EXPORT/VIEWS_AS_TABLES/TABLE_DATA
. . imported "SCOTT"."EMP_DEPT"                        6.757 KB      14 rows
Job "SCOTT"."SYS_IMPORT_FULL_01" successfully completed

SQL> select object_name,object_type from dba_objects where object_name='EMP_DEPT_VW';

OBJECT_NAME                    OBJECT_TYPE
------------------------------ -----------------------
EMP_DEPT_VW                    TABLE

-Thanks

Suresh

Oracle 12.2 New Feature : Hot Clone PDB using Database Link

Hi,

In release 12.2, we can use database link to clone the PDB.  Here is the example.

SQL> CREATE USER c##clone_dba IDENTIFIED BY clone_dba CONTAINER=ALL;

SQL> GRANT CREATE SESSION, CREATE PLUGGABLE DATABASE TO c##clone_dba CONTAINER=ALL;

SQL> CREATE DATABASE LINK clone_link CONNECT TO c##clone_dba IDENTIFIED BY clone_dba USING 'pdb1';

SQL> CREATE PLUGGABLE DATABASE pdb2 FROM pdb1@clone_link;

CON_ID                KEY_ID

----------------------------------------------------------------------------

3                      AdWnyKVvm092v8GGP7X0a30AAAAAAAAAAAAAAAAAAAAAAAAAAAAA

1                       AVJVz6PQnU+yv1+F60vfGQoAAAAAAAAAAAAAAAAAAAAAAAAAAAAA


-Thanks

Suresh

Docker : Oracle MySQL Container


Assuming you have completed docker installation on windows and registered with oracle container registry, Read first part here if not yet done

This post explain how to create a container for mysql and also show some example of managing container etc. In less than 10 mins mysql database is ready and you can practice what ever you like.

Pull Docker Image and Run the docker with default  options

docker pull container-registry.oracle.com/mysql/community-server

Run the docker with mysql image, I have kept the root password and name of docker is mysql5.7

docker run --name mysql5.7 -e MYSQL_ROOT_PASSWORD=sayit -d container-registry.oracle.com/mysql/community-server:lates
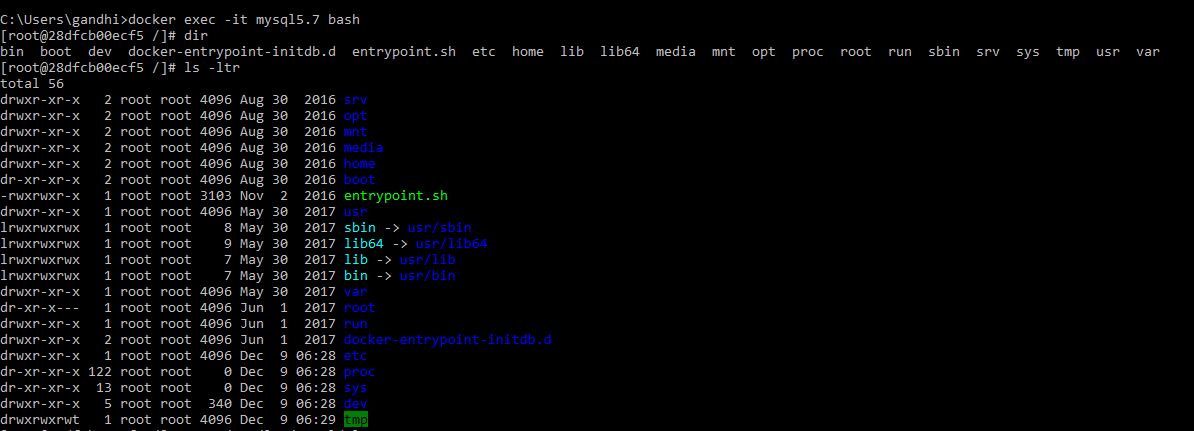
Login to Shell

docker exec -it mysql5.7 bash

mysql1 mysql2 mysql3 mysql4

Getting connected outside from the docker use -p or -P option while run the docker command


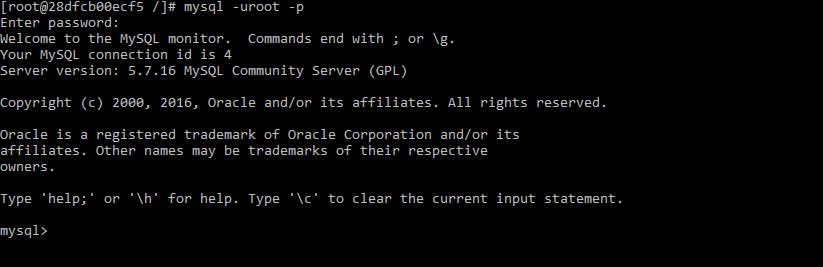
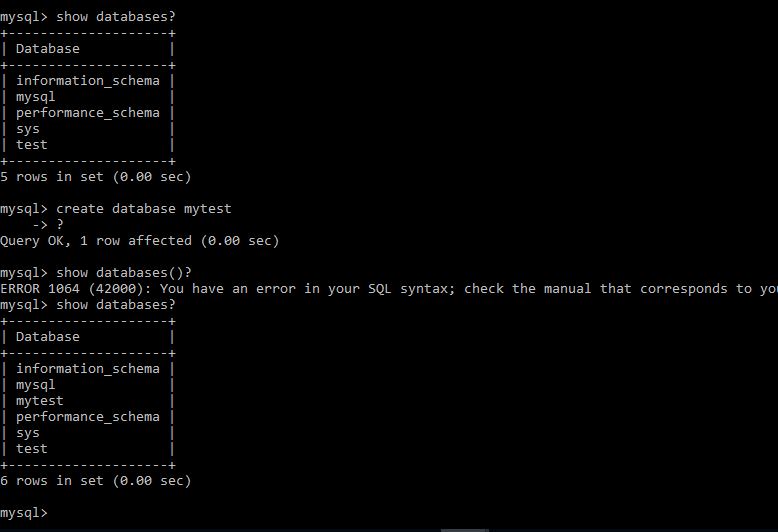
Once logged in , show databases and create databases etc and rest of things will be as usual.

mysql7


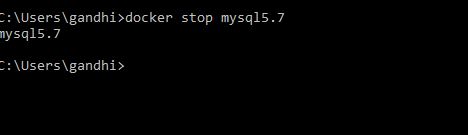
Stop docker container

docker stop mysql5.7

mysql5

Start docker container

docker start mysql5.7

mysql6


Remove docker container, you can use -f option to forcefully delete the running docker

docker rm mysql5.6 -f 


Further, if you want to keep any additional parameter you can use a cnf file and run the docker run command, this file will replace the cnf file in the docker container 🙂

The MySQL startup configuration in these Docker images is specified in the file /etc/my.cnf. If you want to customize this configuration for your own purposes, you can create your alternative configuration file in a directory on the host machine and then mount this file in the appropriate location inside the MySQL container, effectively replacing the standard configuration file.

If you want to base your changes on the standard configuration file, start your MySQL container in the standard way described above, then do:
docker exec -it my-container-name cat /etc/my.cnf > /my/custom/config-file
… where ´/my/custom/config-file´ is the path and name of the new configuration file. Then start a new MySQL container like this:
docker run --name my-new-container-name -v /my/custom/config-file:/etc/my.cnf -e MYSQL_ROOT_PASSWORD=my-secret-pw -d container-registry.oracle.com/mysql/community-server:tag